
Diamond Tufted Dining Bench
 Hey-o!
Things have been busy this winter, the holidays never let up! I built this bench last October and finally finished it on Thanksgiving Day.You can find plans to make your own dining bench on Ana White’s site here. check out her official plan for your materials list and measurements. Thanks Ana for letting me contribute a project!
Picture this: Me and my husband dragging the bench out onto the street between traffic to take photographs (between basting the Thanksgiving turkey, mind you). I’d snap a few pics, then we would have to pick it up and move it to the curb while a car went by, then back out in the street for more photos. Our neighbors even came outside to make fun of us! I’m taking pictures, Sam’s doing the heavy lifting, and our neighbor is across the street yelling “Why don’t you leave it out there, (neighbor who shall remain nameless) already parks his car on the lawn!” Good times.

Anyway, I’ve been wanting a dining bench for some time. Not for dining, but in our little house, we have a room doing triple duty as an office/ sewing and craft room/ homeschool room. I have a large dining table set up for the girls to do their work, and since we officially kicked off Kindergarten this year, I needed to get this space whipped into shape. My girls are little and the bulky dining chairs we were using were so clunky, uncomfortable, and the girls were always falling off and getting tangled in the chair frame (don’t ask). A bench was the perfect solution. It’s comfy, it’s spacious, they can sit right next to each other. Not to mention it’s super stylish, and with the design elements I used, it’s got sentimental value as well.

This bench is assembled with basic 2×4 and 2×6 boards. Heavy-duty, cheap, and easy to work with. But the big difference you will notice is how super comfortable it is to sit on. That is thanks to the elastic webbing used as a cushion support rather than plywood. It has a little “give” and holds up quite well. After some research online, I found that it is very common in European crafted furniture and has almost replaced the old way of building supports with springs, twine, and burlap webbing.
I found myself flipping furniture at World Market the other day and “Surprise!”
Guess what they use on their chair platforms?
Elastic webbing! (Am I nuts because I went back with my camera and made my 5 year old daughter hold up the chair while I took the picture?)

I chose a simple fabric to cover the bench. A linen-like cotton with tan and orange threads. I think it’s the first orange anything I’ve ever owned, but it’s fun and just right for the space. But the best part:
The BUTTONS!

These were part of my Grandma’s collection. When I was a little girl, my Grandma kept her button collection in large mason jars- I just loved to look at them! So colorful, each one so unique…I would dump them out on the table and look at them one by one, sort them by color and style. She grew up during the Great Depression, you know. Any shirt that was ruined got turned into rags, and every button got snipped off for a future use. Gotta love that green thinking! So when I planned the design for this bench, the diamond tufting was a perfect way to showcase some sweet memories of my grandmother.
I made this build a whole lot harder on myself than it needed to be. I finished the bench and then realized it was too short for my table. Dang it! So I had to remove the legs and make new ones for the frame. Of course, I had already upholstered the entire thing, so I had some dismantling to do. I like to think that I’m just getting the kinks out for the next guy that builds this….so here ya go next guy. It’s all ready for You!
Here are a few of my suggestions (more like lessons learned!) before you start cutting:
1. Pick a friendly fabric. If your bench will be used for nightly dinners, choose a fabric that wipes easily. Patterns hide stains better than solids. Look into patio furniture fabric. It’s treated, fade resistant, and can take a beating. Now that patio furniture costs as much as a living room set, it is much easier to find fabric in attractive colors and patterns at affordable prices. Also, pay attention to the way your fabric runs on the bolt. You will want something that is “railroaded” if you choose a print. That means the design runs with the roll on the bolt. Otherwise, if the pattern runs the opposite direction, you have to piece it together and there will be seams across your bench. I’m halfway regretting my fabric choice now, because the top of this bench has become a perch for the newest member of our family, Prince. His little claws have not been friendly. He likes to use it as a runway before he launches on his next target.

2. Know your foam. The most frustrating part of building anything requiring foam cushioning isn’t the sewing or the stapling- It’s the cost! Foam is insanely expensive. I even considered buying a junk sofa from Goodwill to harvest the foam seat cushions. Most foam is sold by the foot in different densities and you can find it at craft and fabric stores and local upholstery shops. I found a great resource online at DIY Upholstery Supply. They sell it in long lengths for church pews- perfect application for a dining table bench. However, as luck would have it, I found the best deal ever in my town. My local Fred Meyer (Northwest Chain like a fancy Walmart) sells it in their sporting goods section. I was able to buy a 6 foot x 30 inch x 3 inch thick foam camping mat for $20- That is unheard of! The same piece would have cost around a hundred dollars at JoAnn’s. Shop around and see what other applications this type of foam can be used for; I never would have thought to look in the camping section. It was a happy accident!
3. Measure your table. This bench plan is very simple to make and easy to modify to fit to your table. You can measure the height of an existing chair or estimate an appropriate height to fit your space. Also, making your own bench gives you the opportunity to custom fit the seating. If you’ve got a “Honky-Tonk-Ga-Donk-a-Donk,” then you can build this baby to match. I personally went around and measured all of my favorite seats in the house to get a good average. I made my bench 24″ deep, it’s very full and has room for a few throw pillows. I have a slight obsession with throw pillows, so this gives me another space to use them. You can also make the bench as long as you would like, however, any more than 60″, I would consider adding legs in the center of the frame for support.

4. Dry-fit the bench before upholstering. I added the foam and fabric to my pieces before I drilled and bolted the frame together. That was a dumb move. Check for level and make sure the seat and back are square before you drill and bolt and definitely do that part before you have the bulk of the foam to combat.
So let’s get started!
I measured out the angles on the 2×4’s for the back frame and cut them out with my circular saw. I used the jig saw to get in the small spaces where the seat mounts to the back. My bench legs were 12″ tall. Sanded them fine and gave them a coat of stain. I used Minwax Special Walnut.

While the stain dried, I cut the seat frame. You’ll notice in my pics that I just assembled it at a flat frame. Well, I had to go back and fix that part! On the first go-round, the front legs just attached underneath. They ended up being too short and wobbly. The legs really need to be incorporated into the frame for added strength and support. It’s also important to use corner blocking to keep the frame square. That was another “oopsie.” I added it after I installed the elastic webbing for the tramp.
Next comes the seat platform. Notice that the side frame pieces are angled and the front and rear boards are two different sizes. This makes for comfortable seating and gives the bench a little more style other than looking like a big block. For the center braces, I used 1×4 boards mounted flush with the bottom of the frame. You want a gap between the tops of these boards and the top of the frame because the webbing will dip for comfort. Add corner blocking to keep the frame square.


And last but not least.
My big do-over.
I had to back and cut into the frame to add legs that are incorporated into the frame. The final plan should have eliminated this issue, but we were still in the research and development phase. I notched out a 1 1/2″ piece from the front corners of the frame and attached the legs with pocketholes.

The rear frame has two horizontal support pieces to keep things square. The top piece is a 2×2, the center rail is another 2×2 (flush with the rear of the frame),a 2×4 brace that will attach where the seat rests, and behind that, a 1×2 is added to the rear of the 2×4 to give your backing a place to attach. I clamped everything in place while the glue dried. Make sure everything is square. Stand it up to make sure the vertical is level too.

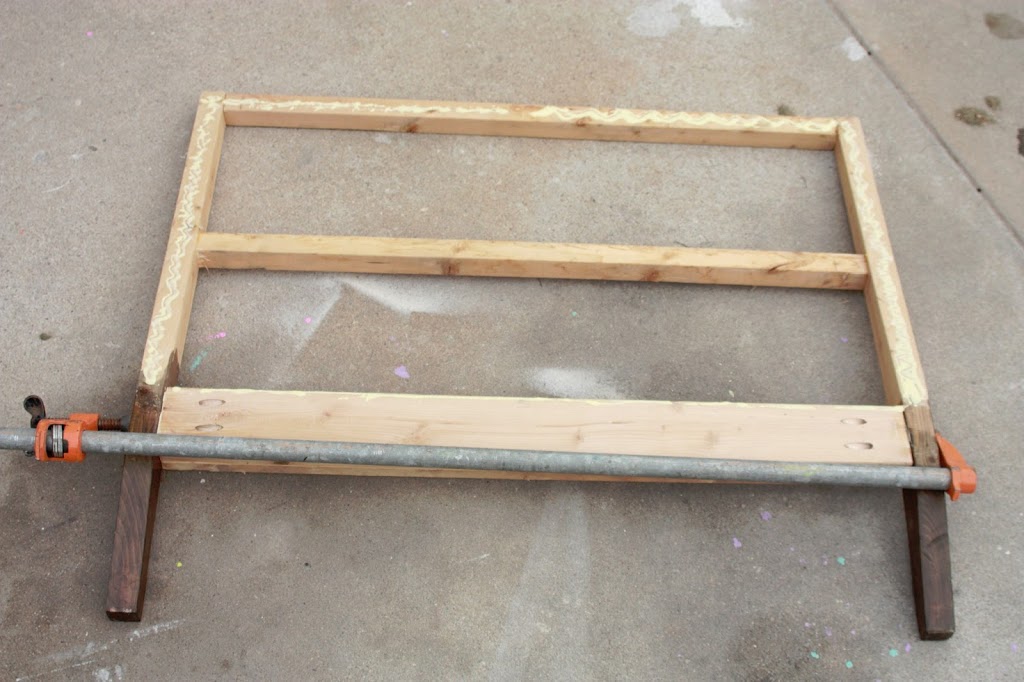
With the two pieces done, this would be a good time to clamp them together and drill for your bolt assembly. Make sure that the bench is square and all four legs are resting firmly on the ground before drilling. Use bolts with washers tighten the two pieces together.

Next, I cut the foam for the back cushion…I cannot say how thrilled I was to find another use for my jigsaw! I’ve seen numerous craft shows where they use an electric carving knife to cut foam. I don’t have one, and thankfully the jigsaw worked, otherwise, I was breaking out the Sawzall!


Because you will more than likely need to piece a few foam scraps to cover your board, I used Loctite Spray Adhesive to join my seams. I purchased the general purpose vs. the hardcore permanent stuff because I knew I would want to use the rest of the can on something else. It worked great.

Attach the backer board to the rear of the bench with finish nails. Then give the board a nice coat of adhesive spray and stick your foam on top. Press down so it can bond and let it dry. it will stay slightly tacky, so if you need to make any adjustments, you can pull it up and re-stick till your heart’s content.
Cut another piece of foam for the top. Since your fabric is going to wrap over the back and you will be grabbing the top to move in and out of the bench, it needs a little cushion up there as well. I added a piece that was 2″ high and sprayed it to everything else with the adhesive.

The seat frame comes together quickly in preparation for the seat cushion. Once the frame is done,
now comes time for the elastic webbing. I purchased 10 yards off of Ebay from Victorian-Upholstery to make my 4′ long x 2′ bench. Elastic webbing comes in different grades; some is more firm for back support, and some has more give for seat support. I chose a mid-grade that would be flexible for any use. I probably used 7 yards to complete this bench. If you look into elastic webbing, there are tools you can buy called webbing stretchers to grip the webbing while you pull it taut. They are around $30, and since I didn’t anticipate using it all the time, I tried to find a way around it.
And guess what?
Boom.

That is an undercoat brush for our dog. No kidding. It is almost identical to a real stretcher and it worked great.
The best way to do this quickly is set it up in the living room and make sure your husband is laying on the couch watching Sportscenter.
With your frame and elastic webbing ready, grab a stapler and staple down the first edge. I used five staples to hold each end down with a 1″ overhang that I stapled down to the side. Once one side is securely in place you can pull the webbing across to the opposite end. Pull it as tight as you can, then use the webbing stretcher (er, dogbrush) to pull extra tight.
At this point, your husband will witness your act of strength, and not to be outdone, the Shirtless Wonder will hop off the couch and demand that you let him do it. The webbing stretcher is completely unnecessary as he uses sheer brute force to pull the webbing taut while bearing down against the frame.While he is “Showing you how it’s done” you are free to staple at will, leisurely walk around, and take pictures of the process.

You tricked him so good, he’s now doing all the work!
Until he realizes that you tricked him, that is! Then he’s giving you the “Stink-Eye” and saying things like “Are you gonna put down the camera and help me over here?” Ah yes, now I remember why I just LOVE doing projects with my man.
Okay, so you are going to lay all the strips in one direction stapling them on each end with an overhang of 1-2″. Each strip is placed 4-6″ apart all the way across. Then, when you are finished with one direction, place the next set perpendicular, being sure to weave back and forth (basketweave pattern) between the rows so you end up with one solid support.
Remember the placemats you made in elementary school with construction paper? This is a larger version!
I ended up adding a row here and there, so my pattern is off, but you get the picture:

Once the webbing is finished, the cushion is cut for the top. I sprayed down the frame with more adhesive and stuck the foam right over it. Remember, my picture below is incorrect from the actual plan because this was a “before” when I had not added the front legs to the frame. Where the rear of the seat meets the back of the bench, the foam will touch and it was nearly impossible for me to get the frame pieces bolted together.
(This was where my Rage-a-hol kicked in and no matter how hard I clamped and squeezed I could NOT get the frame to align. After I calmed down and “regrouped,” it really was a simple fix. Time-outs are not just for kids.)
I had to trim the rear of the cushion at a 45 degree angle so that the bench would bolt together. If I were you, I would trim the back cushion instead, this way, the seat cushion will rest under the back cushion. If that makes sense to you, you will see what I am talking about in the final pictures.

Next, it’s upholstering time! Follow the link for part II.
Linking up and Partying here:


![]()


![]()


WOW! That is so completely impressive. Love the street shot 😉 Only a blogger right? lol.
Okay OMG! I have always wanted to try something like this but NEVER ever thought I would be able to, you are giving me ideas … i think my to do list just got a little bit longer!
Hi Jenny, Your bench is Fab ~ Thank you for sharing! May I ask where you got the printed fabric, and was it recently? I'm needing something like that to pull together all the colors of various rooms in my house. Right now they look like separate entities and I NEED THEM TO MAKE SENSE, Lol! What can I say I'm a colorful soul 😉 Thanks, Jewelz!
Oh…wow! Way cute! I saw this earlier on Pinterest and pinned it!
LOVE your fabric choice and the buttons! I absolutely NEED a bench like this in my life 🙂 Pinning!
STOP IT! I've been seeing this all over Pinterest tonight! LOVE this!
AWESOME! XO, Aimee
Yes! Isn't that fabric great? I came across it while I was shopping at Home Fabrics. It's and older print, but I was able to find it online.<br /><br />It's by Robert Allen Home. It's called "Summerlin Palm Beach." I paid $ 7.99/yard at my local store, but it is going for double online. Shop around for the best deal!
Wow, amazing job! It turned out so elegant! I love that you used different buttons.
I TOTALLY LOVE this bench! I have been looking all over for a bench for a dining table that we keep in our family room. It is our crafting, sewing, homework table. I have a bench now, but it is not very comfortable. I saw one at World Market and then read the reviews. They were terrible. I found one at Ballard and read their reviews. Once again, terrible. I am pinning this and hope to
How beautiful!!! I love the color, and everything about it! Beautifully done!
Thanks for the info, you have Great taste!
I love everything about this …the color, the different buttons. Amazing job!
Whoa – you're amazing – what a beautiful bench ( and your tutorial is amazing too! ) <br />Definitely your newest follower!!! Would love to have you come by for a visit!<br />Hugs,<br />SUzan
Came over from Stone Gable…WOW! That bench is over the top perfect! I thought I was going to hear about you buying it at World Market and wondered how you got one in such a deeeeelightful color! But you made it!<br />Way to go!<br />xo<br />Robin<br />All Things Heart and Home
Super job and great tutorial! Thanks for sharing it with us!
Oh, I LOVE this! I've been wanting to make something like this for our new dining room, and your tips and step by step photos are fantastic. Thank you for sharing!
This is INCREDIBLE!!
Wow! I love it! I love that you used your Grandma's buttons. It looks amazing.
I am absolutely in LOVE with this project! The buttons are the perfect finishing touch. Perfection! I'm so glad to have found your lovely blog.
This is amazing! We just found your blog and we are your newest follower! We would love for you to check out our blog!<br />http://mybest-friendsblog.blogspot.com
This bench is just adorable! You did an amazing job and managed to create an amazing tutorial! I'm so scared of re-upostering furniture, but your explanation is giving me confidence to go out to my garage and get started! Thanks so much!
I'm glad you like it! I was going to make a solid back cushion until I saw the tufted ones at World Market. All of those buttons are just so cool. Bummer about the bad reviews, the price usually stops me, but an uncomfortable bench is even worse!
Thank you! I just checked out your blog, I loved the "Grey Gardens" post! I must follow you now!
Thank you!
Thank you! I love those buttons too; Grandma lives on!
Thank You! Isn't it all so intimidating at first? Once you jump in, it's much easier than you would have ever thought!
Thanks! You two are adorable. I love it when I find a new fun blog!
Thanks, I'm glad you found me too!
Thank you!
I'm glad you like the bench, thanks for stopping by!
Thanks!
Thanks, they really do make it colorful and fun.
Wow! What a great job you did! And great tutorial with all the pictures. TFS!<br />
This is absolutely amazing ~ I want it!!!!<br /><br />Thanks for linking up such an awesome project and helping to make Project Inspire{d} a success!<br /><br />~hugs, Mary Beth~
I am amazed by this…what a fabulous piece of furniture…and I LOVE that you put it in the middle of the road to photograph! Cracks me up! I'd love for you to come link this up at my Tuesday Time Out!<br />Melanie <br /><a href="http://www.reasonstoskipthehousework.com" rel="nofollow">Reasons To Skip The Housework</a>
What a huge undertaking! You bench turned out beautifully, and I love the special touch of your grandmother's buttons! I'm so happy to have read your tip about the foam…I'll be scouring the sports store the next time I'm there!
WOW! Amazing! I can't wait to see the rest!!! Little Bit from http://www.DecorateWithaLittleBit.com
Simply Amazing! You did a phenomenal job! The whole thing is extraordinary and I am green with envy at your ability. (You need to see what I undertook to see why I am such a fan of your work)<br />This will be a piece you treasure for years and years. Thanks for sharing.<br />Nancy<br />http://wildoakdesigns.blogspot.com
It looks amazing!! I saw that couch and World Market and drooled over it for a good five minutes. Your version is so pretty! Totally drool worthy.
Visiting from Southern Style. This is so cute! Too much project for me, but I love how it turned out for you!! I love that you used your grandma's buttons!!<br /><br />Lindsey @ GrowingKidsMinistry.com
It's beautiful!<br />-Lora
this is amazing, i can't believe you built this. love the colored buttons, and then to read that they were from your grandma's collection, it's even better!
Very impressive and absolutely beautiful! My grandma also had jars of buttons, I loved looking at them!
Nice job! That was a fun read, to:) My grandma used to keep her buttons in a tin box and I too used to love to sort through them and look at them, pick out my favorites, etc. Thanks for sharing!<br /><br />xo, Christy
Wow, you did an AMAZING job! I love the tutorial!
I have built an ottoman from scratch so I can appreciate your work. You did a beautiful job. WOW! She's a beauty! I'm including a link back in this week's highlights. Thank you so much for sharing your tutorial and tips and beautiful result! Love the photos too!
Absolutely stunning! Are you on Pinterest? I would love to re-pin your masterpiece!<br /><br />Christine @ TheDIYDreamer.com
Wow! It turned out great. (And I'm loving the buttons!)
Qué chulo!!<br />quiero uno,me encanta<br />♥♥♥
Okay, you've given me some great ideas with this one. Nice job! 🙂 Question… how thick was your foam for the back?
This project turned out beautifully! I followed a link to your site from Ana-white.com, and I have been totally inspired to try building this for my breakfast nook. I do have a question: Are the pockethole joins necessary for the structural integrity, or could I build it using a countersinking drill bit? Since it will be upholstered, it doesn't seem like it would make an aesthetic difference.
You can countersink screws into place. However, a Kreg Jig is so much better for speed and accuracy. If you can't afford the master kit right now, they sell a smaller version that you can clamp to your work and get those nicely angled holes. Sometimes you want the face of your work to be clean and keep the holes in the back. That is wht the Kreg Jig is so great. For this project, everything
Found you from Hometalk and I love this. A great tutorial is, well, great…but the sourcing for the foam….Priceless!<br />Thanks you so much.<br />Kim@reposhtre.blogspot.com
I love your play by play, most DIY's are too wordy and boring. I had fun reading your and laughed at the way you pointed out how you got the big strong husband to help then wished you didn't. LOL Been there! Great work though the bench is beautiful and well made, something you can pass down.
I made a tufted headboard about a year ago, basically using the same techniques. When I went to find the buttons I about croaked at how much they were going to cost. I managed to find a jar of plastic buttons that were very cheap. Otherwise the buttons would have been the most expensive part of the project. I happened to have a piece of white vinyl so that is what we used to cover the headboard.
Thanks for your comment, Robin! I'm a lucky gal, even though my husband drives me crazy sometimes!
Stopped by from DwellingGawker – absolutely love this! Pinning 🙂
Thanks for stopping by, Jen!